Landed cost using item charges in Microsoft Dynamics NAV 2015
Today what I’m going to do is demonstrate how to post landed cost using something called Item Charges in NAV.
What we really want to do is take cost from a freight purchase invoice and apply that to the receipt of an item so that we can increase the cost of the item in our inventory. So the cost of goods sold, when we sell it, is reflected accurately.
View Item Charges
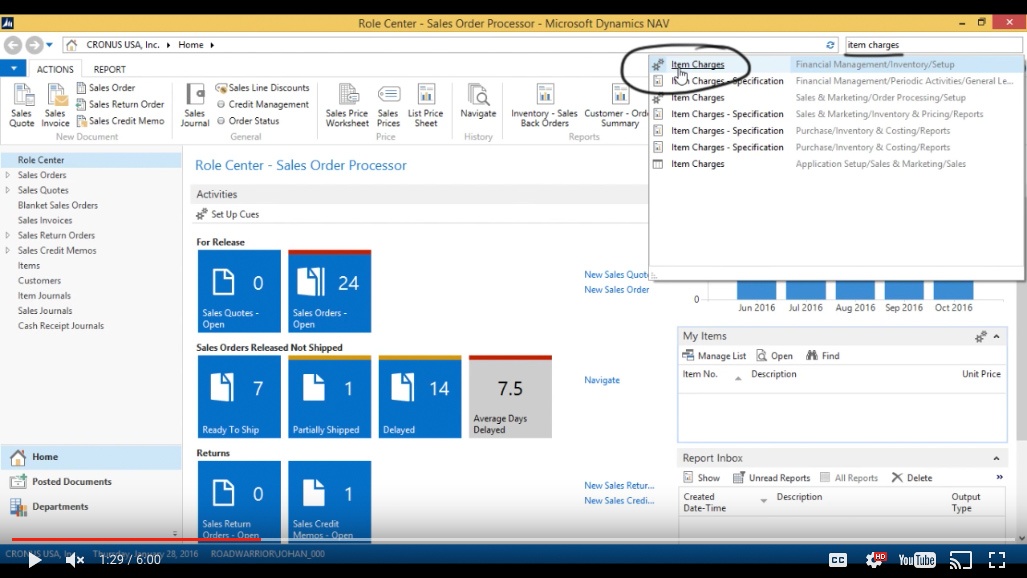
So let me go ahead and just take a look at Item Charges.
(Click image to view larger version)
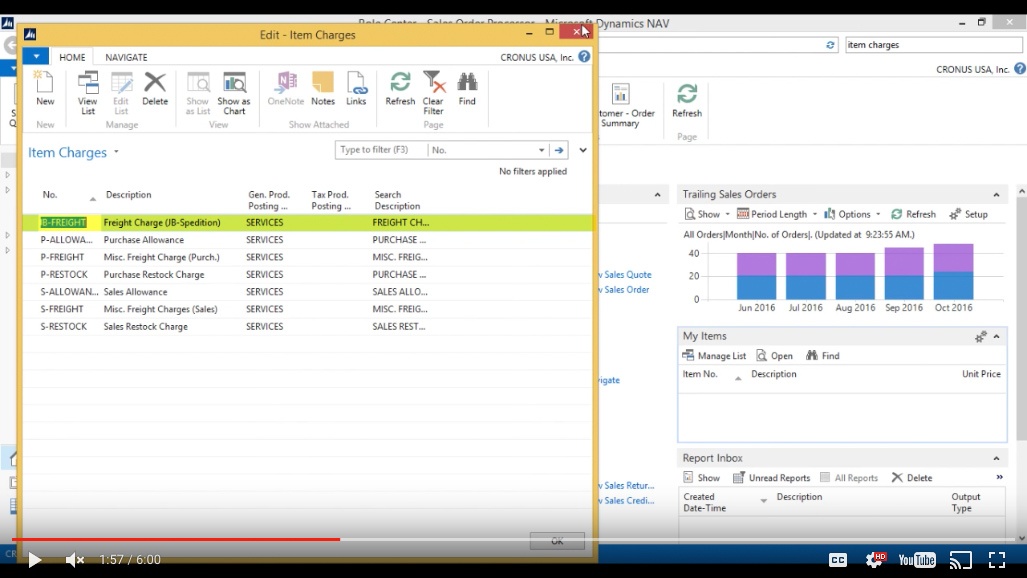
What we’ve defined in our demo system that ships with NAV shows these item charges. Item Charges serve as an instrument that I can put on a purchase invoice and apply it onto the receipt.
We have purchase allowance in there, freight charge etc., so probably the most appropriate one is to use is the freight one.
(Click image to view larger version)
Create a Purchase Order
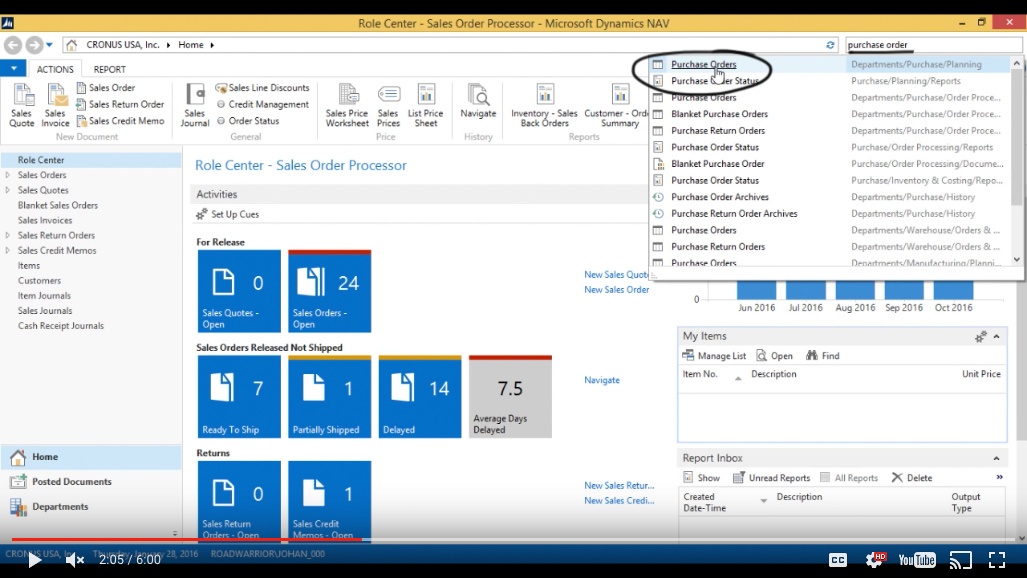
So I go ahead and go into the purchase order.
(Click image to view larger version)
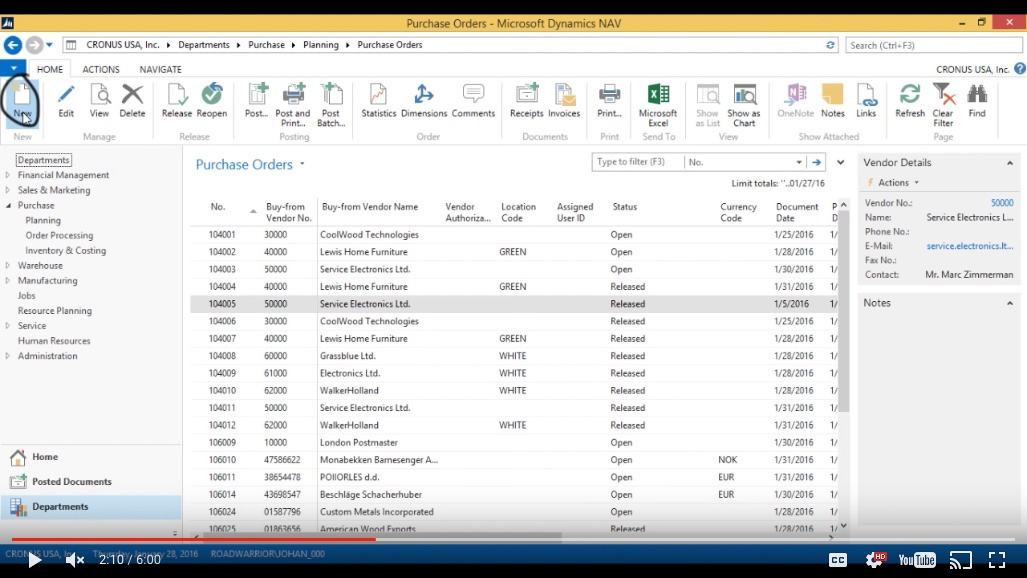
Click on “New”.
(Click image to view larger version)
I’ll create a purchase order for a shipping company called “The London Post Master”. So I’m going to look that one up, enter it in.
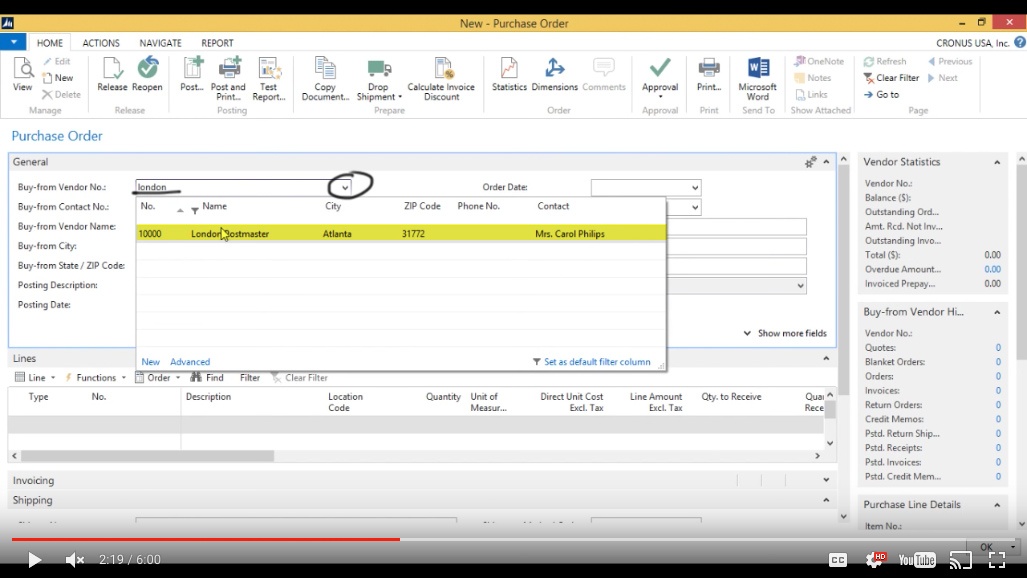
(Click image to view larger version)
Inputting the Line
Then I go ahead to “Type” under “Lines” and instead of picking a GL account or something like that, which normally freight would be posted to; I’ll just pick “Charge (item)”.
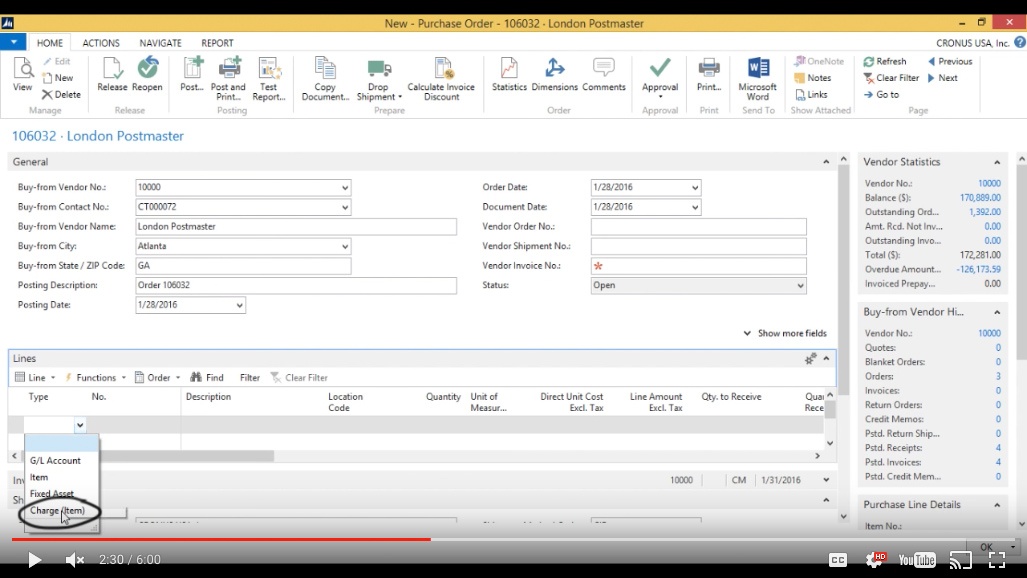
(Click image to view larger version)
Then I go ahead and select the item charge from the list I saw before, and that’s going to be “Misc. Freight Charge (Purch.)”.
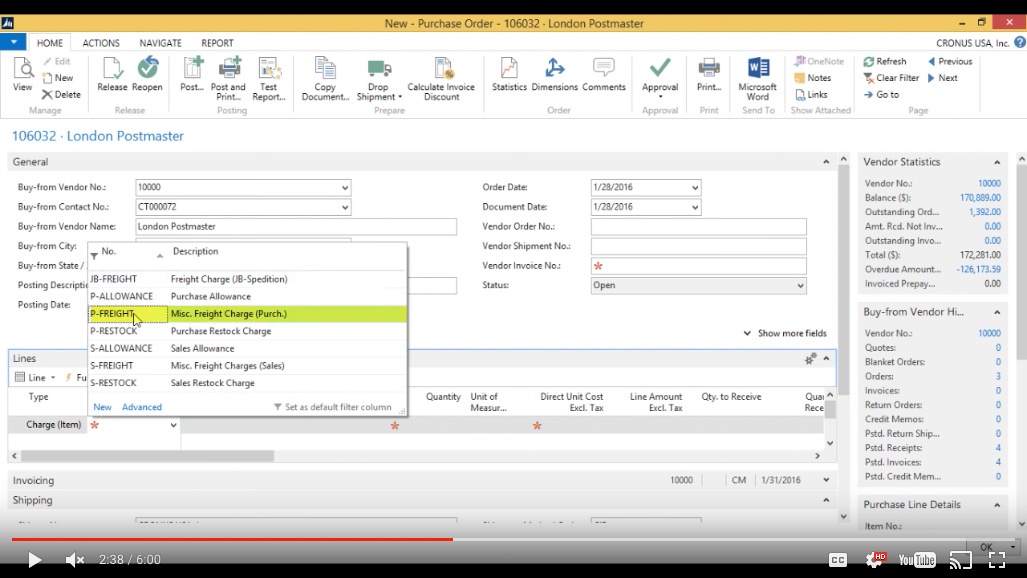
(Click image to view larger version)
In the “Description”, I type “Freight from London”.
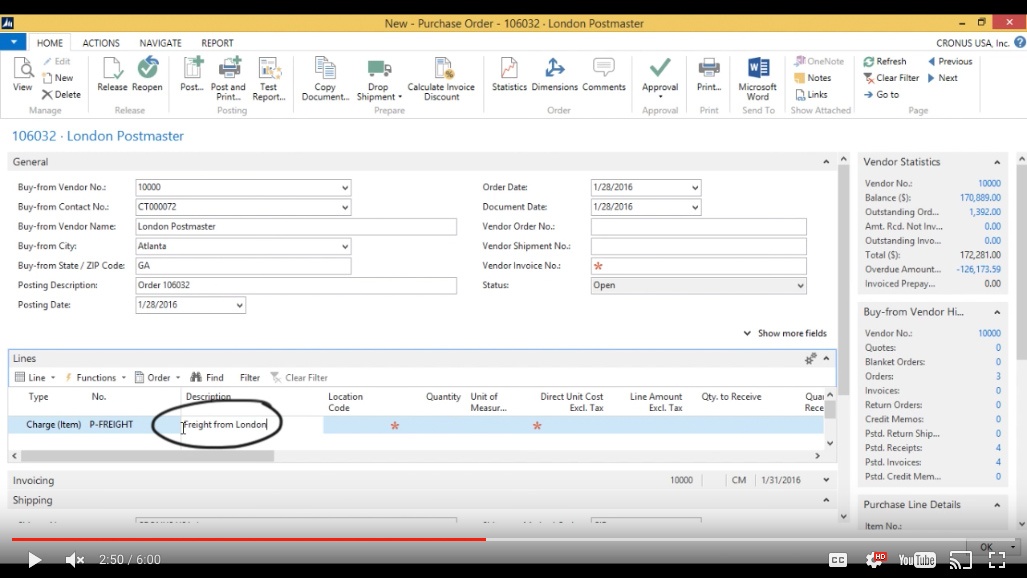
(Click image to view larger version)
I don’t have to put in the location, I just put in “1” for the “Quantity”.
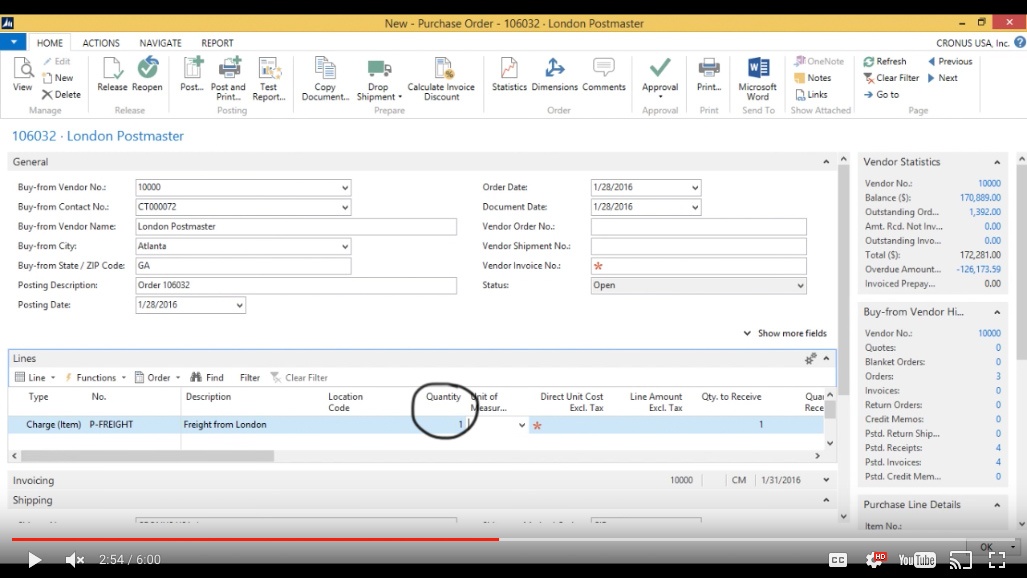
(Click image to view larger version)
Just “1” signifying that I’m going to put the total amount in the “Direct Unit Cost”. So we paid “120.55” for this.
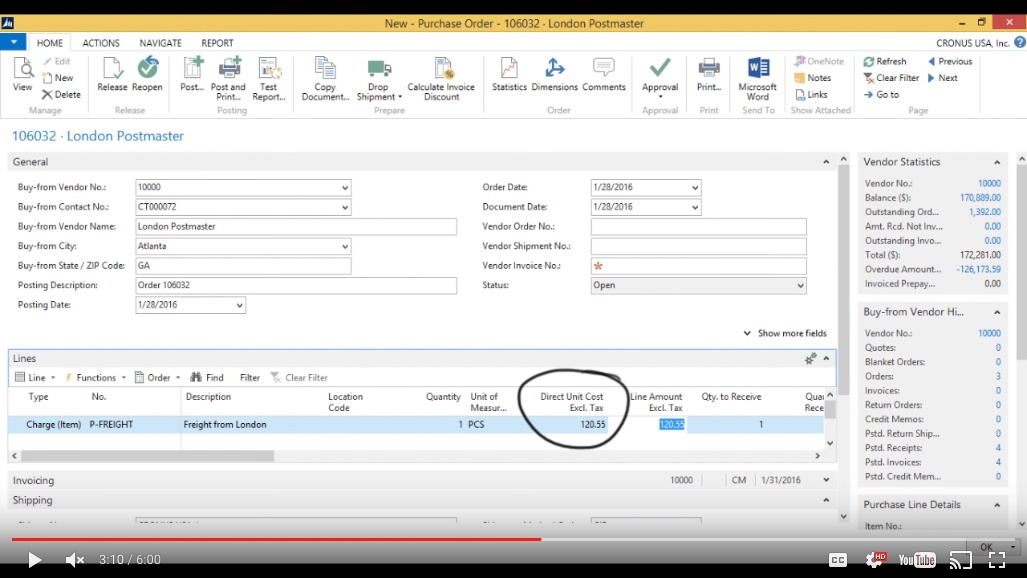
(Click image to view larger version)
Assign an item charge to a receipt
Now what I’m going to do is go into Line > Item Charge Assignment, and I want to assign this to a certain receipt of a coffee mug. Go ahead and click on that.
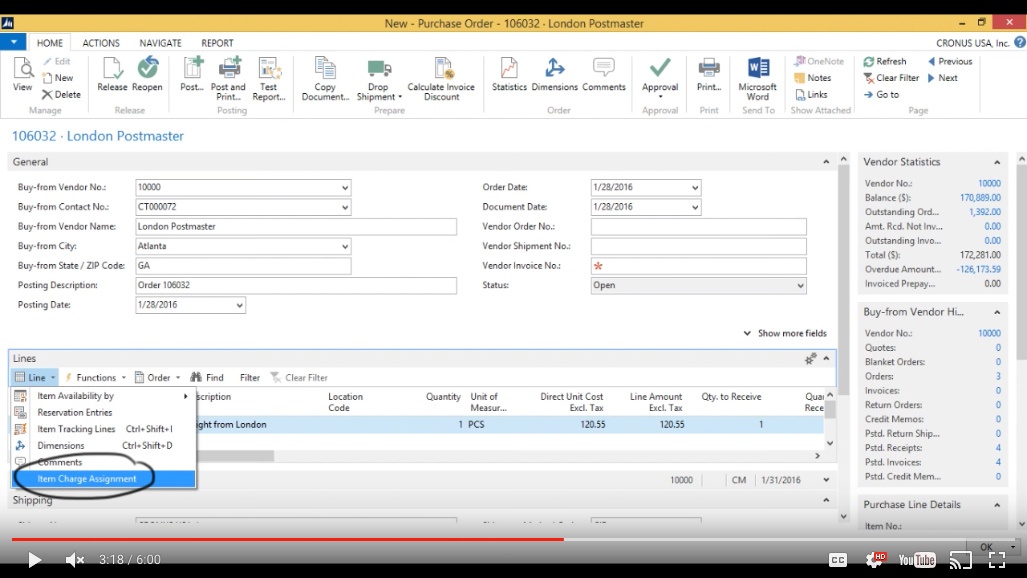
(Click image to view larger version)
The “Edit – Item Charge Assignment (Purch)” screen comes up. I’ll click on “Get Receipt Lines”.
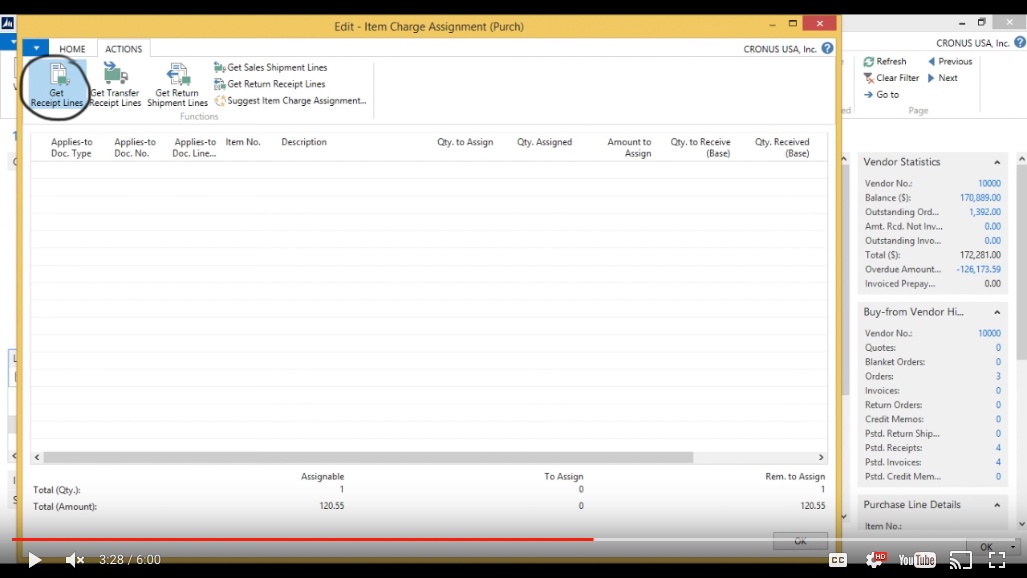
(Click image to view larger version)
Now I’m in the “Purchase Receipt Lines” screen, so I click on one of the last receipts here, the one for 1000 pcs.
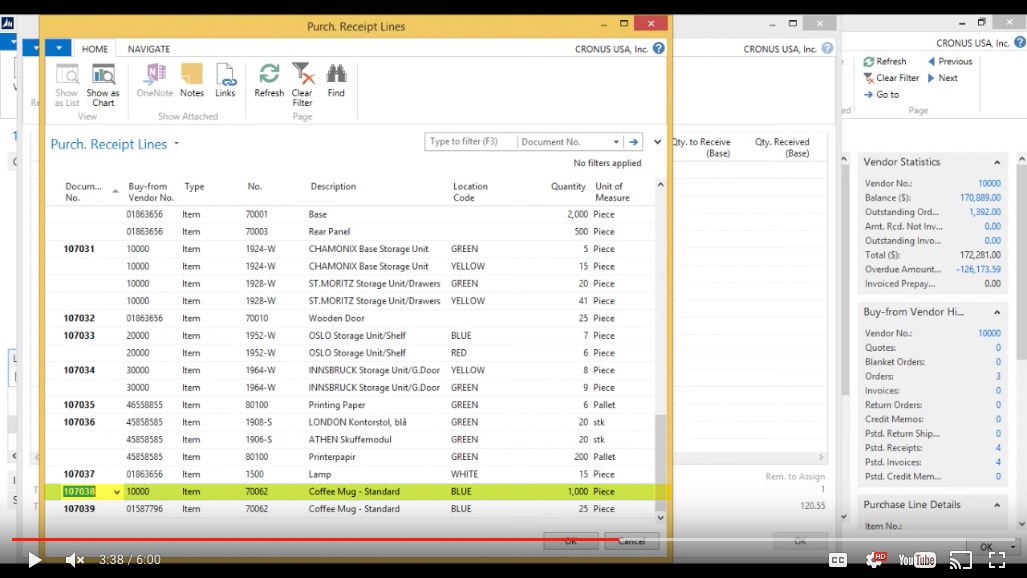
(Click image to view larger version)
In this new screen, I click on “Suggest Item Charge Assignment”.
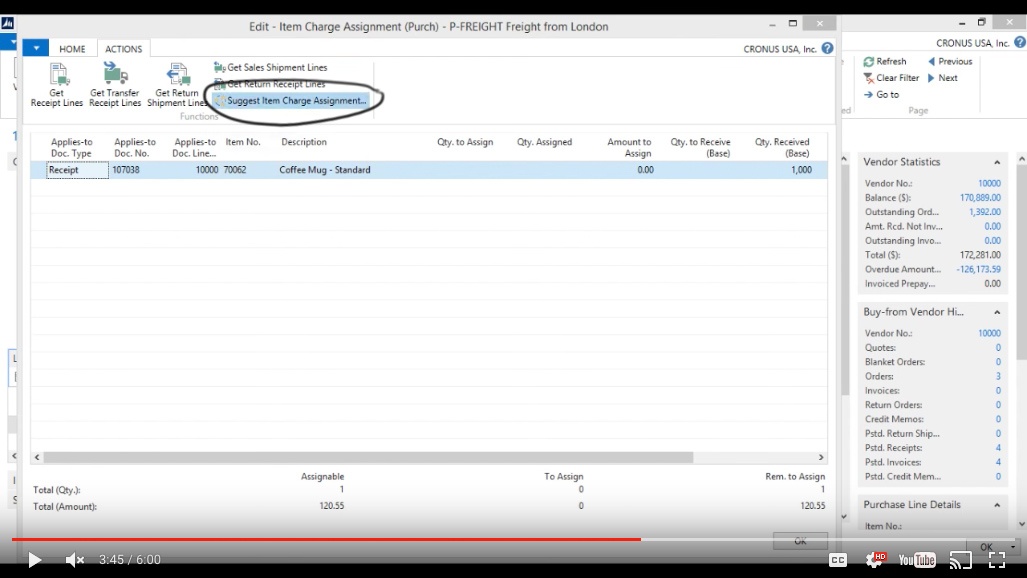
(Click image to view larger version)
That basically means I’m going to spread the freight over the items on the receipt (there’s only one item on the receipt) so if I just do it equally here it will put the entire freight onto that item.
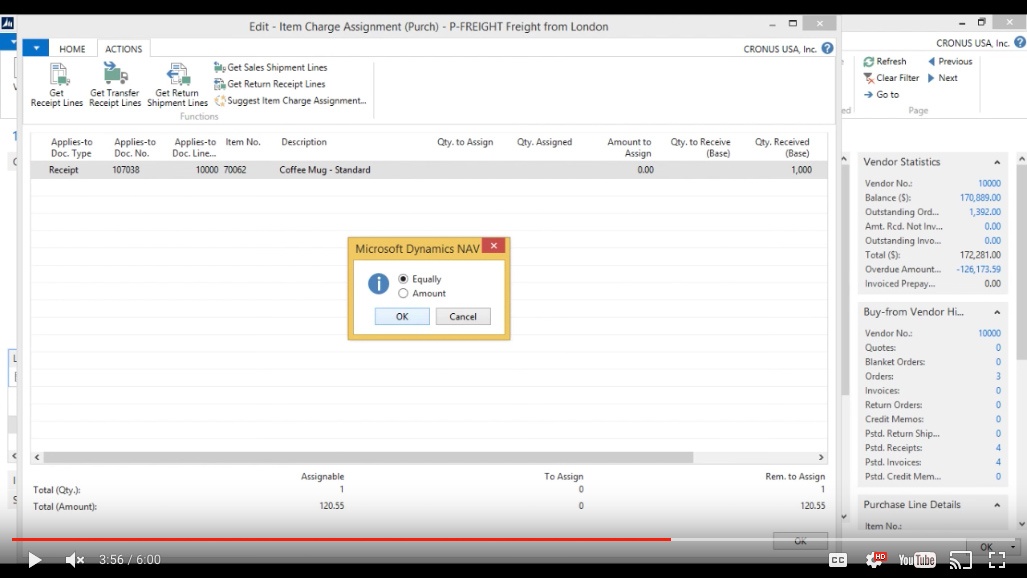
(Click image to view larger version)
Click “OK”.
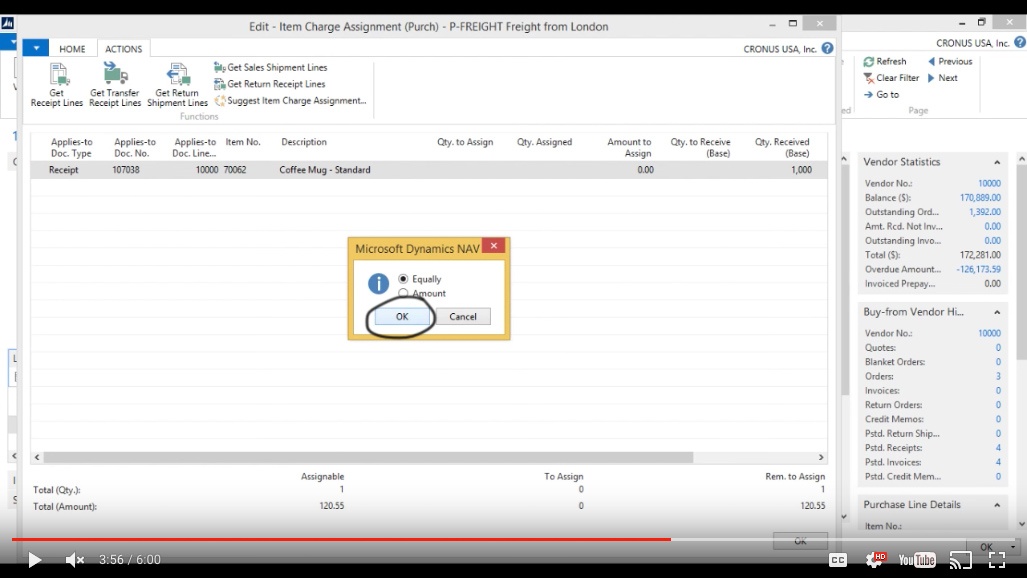
(Click image to view larger version)
Now I put in the invoice number onto the vendor, which was "abc3456" and now I’m ready to post.
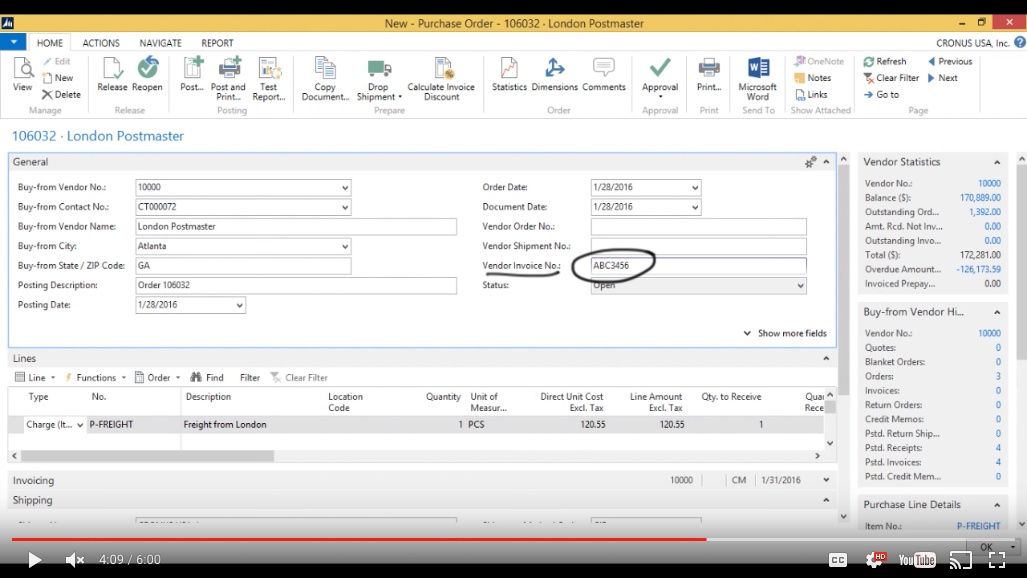
(Click image to view larger version)
Posting
So just keep in mind that it was for those thousand that we got.
Now I hit post.
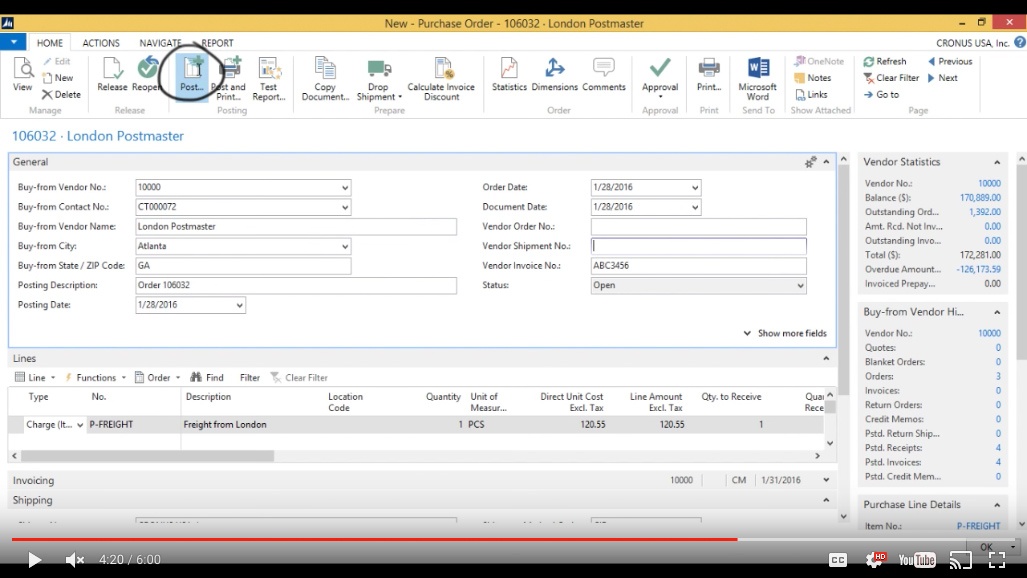
(Click image to view larger version)
I make sure “Receive and Invoice” is ticked, click “OK”.
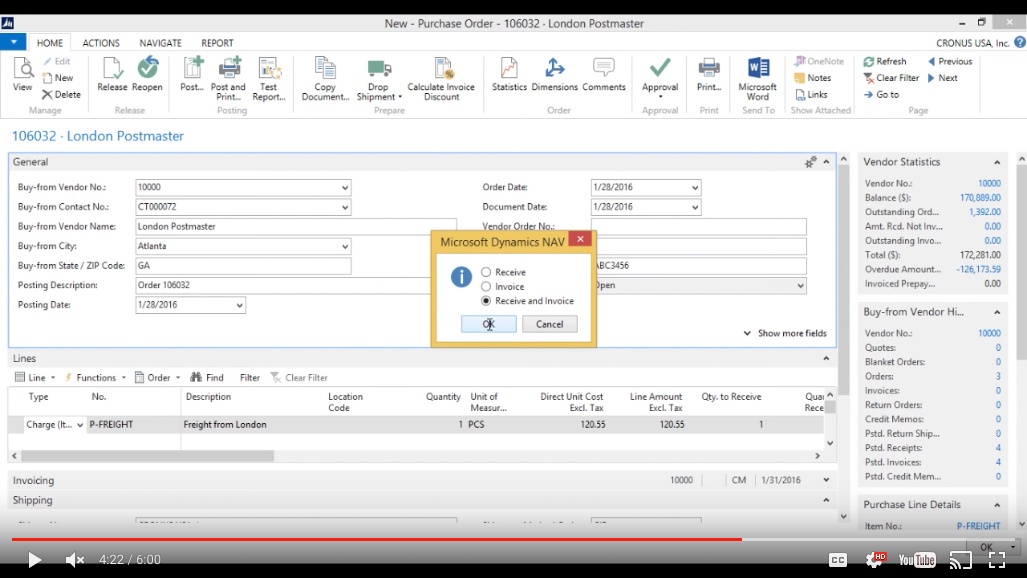
(Click image to view larger version)
You can see it posts everything.
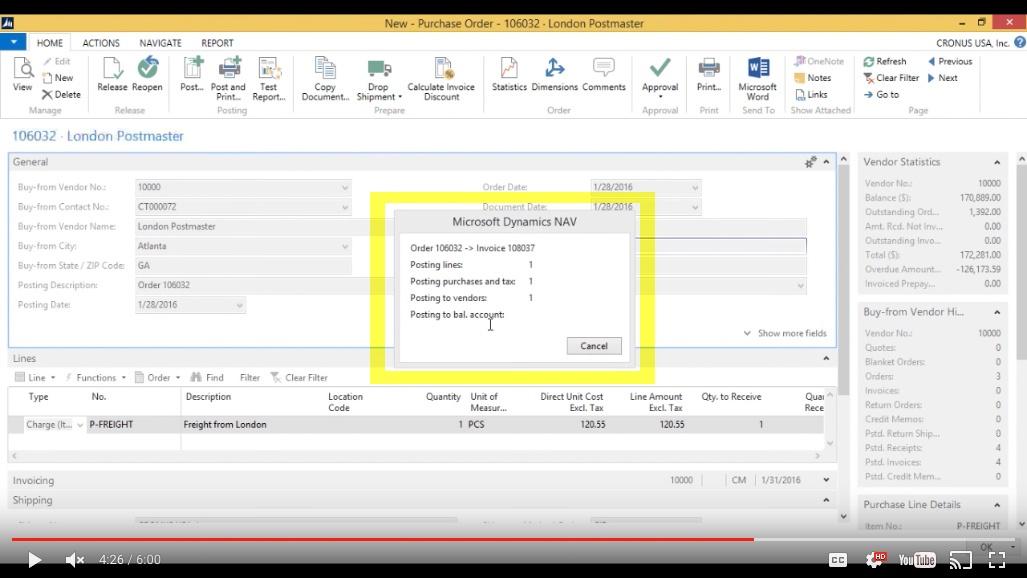
(Click image to view larger version)
View Item Ledger Entries
And now when I want to go into that item, clicking on “Items”.
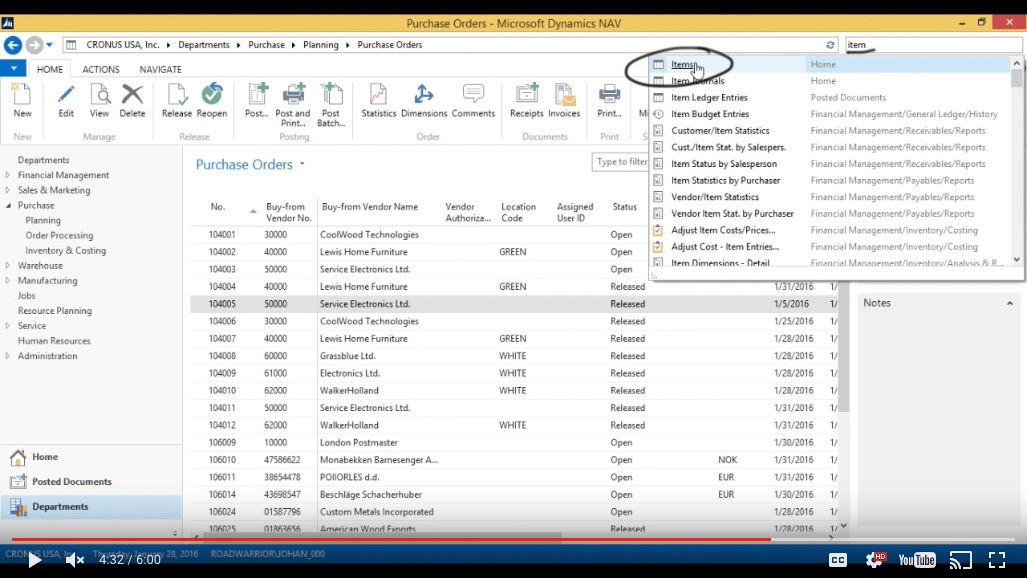
(Click image to view larger version)
I want to take a look at my coffee mug so I look for it in my Items.
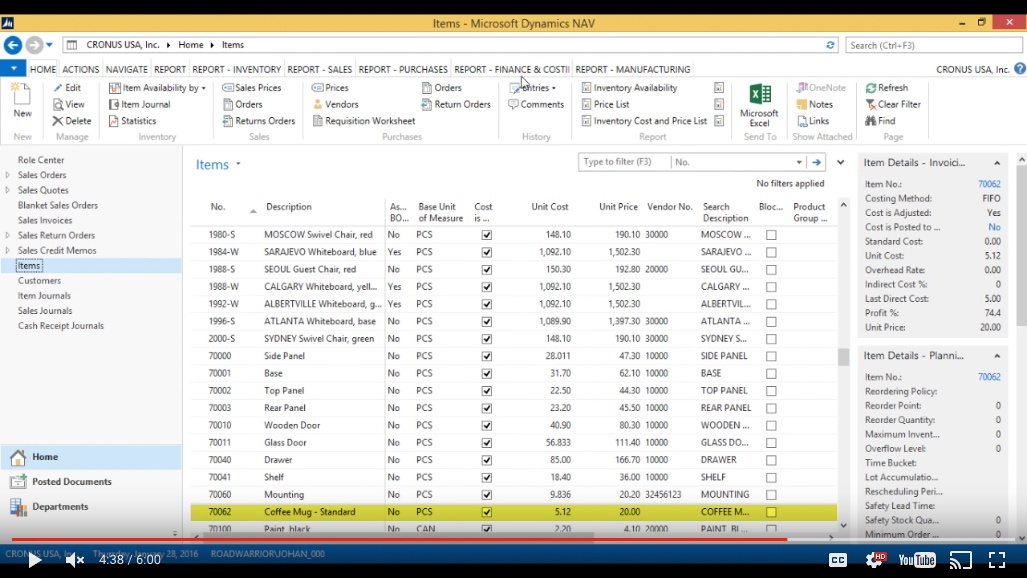
(Click image to view larger version)
So I go into the entries by clicking on Entries > Ledger Entries.
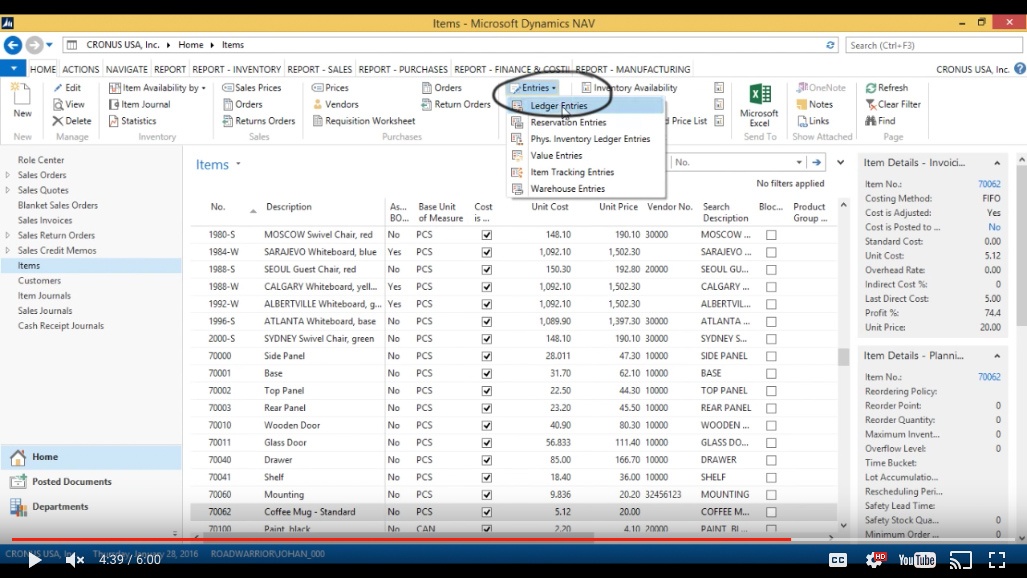
(Click image to view larger version)
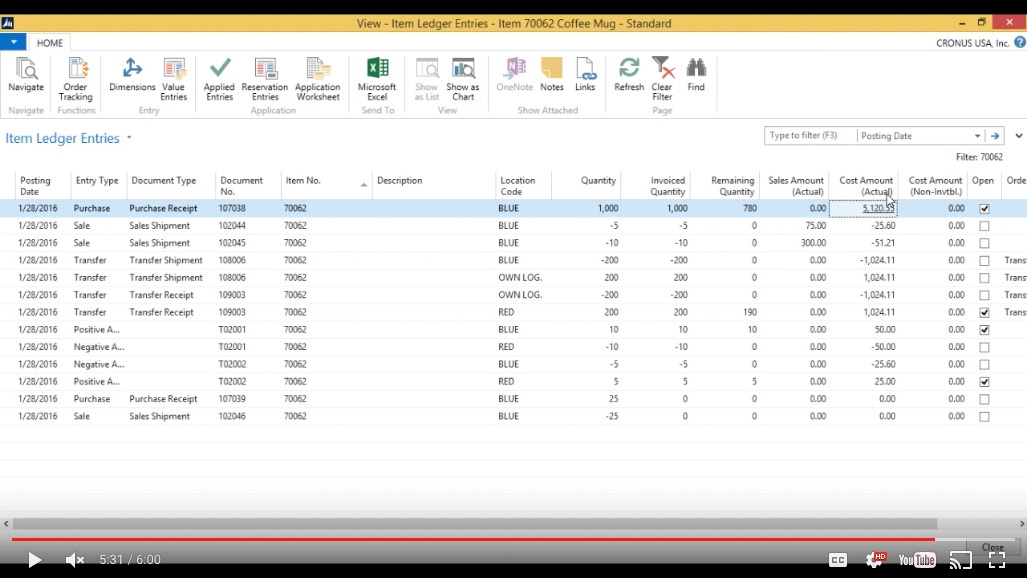
I can see if I take a look at the first purchase receipt that the “Cost Amount” is “5,120.55”. I click on that.
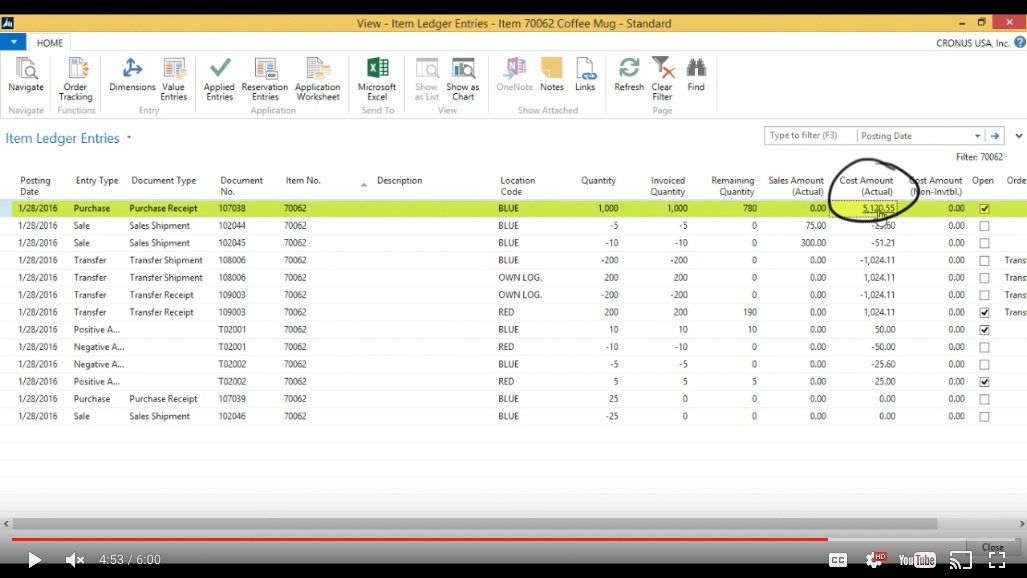
(Click image to view larger version)
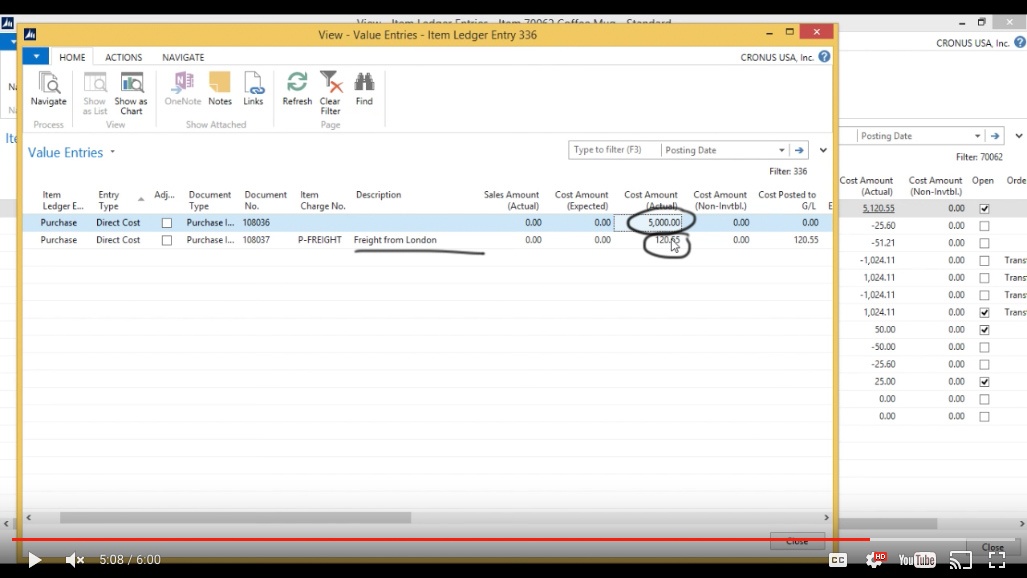
In the “View – Value Entries” screen, I can see that the freight has been applied.
So I paid “5,000.00” to the vendor, but I paid “120.55” to the freight company.
(Click image to view larger version)
View the updated COGS
So my total cost is “5120.55”. What you can also see is that all of the transactions to sales have increased. The cost has increased now, so even though the sale happened after I applied the item charge, it has updated the cost of goods sold everywhere where we sold out of this receipt.
(Click image to view larger version)
And that basically describes the way Item Charges work (or “Landed Cost”, as it’s commonly referred to in the industry) in NAV.
You've learned some of the many ways your business can benefit from using inecta Food. It's trusted by other businesses in your industry and can work just as well (or better) for you. inecta Food is easy to implement. It's easy on your budget with monthly subscription payments. Take the next step to ensure your food business is running the right kind of business software. Software for your food safety, increased efficiency, and stronger revenue growth.
Curious about implementation costs, training, getting a customized demo & detailed estimate, booking a discovery call?

Global Headquarters:
225 Broadway #660,
New York, NY 10007
1-800-632-0573
©2023 INECTA LLC
Global Headquarters: 179 Franklin Street, New York, NY 10013
©2020 INECTA LLC